
An outdoor sauna lives a harder life than an indoor one. Rain, sun, frost, leaves, and steam all work on the same timber, heater, and roof, season after season. A simple calendar turns that wear into small, predictable jobs instead of one expensive repair.
This guide gives you a full-year outdoor sauna maintenance calendar, with seasonal checklists, wood treatment guidance, and clear rules for heater stone replacement. It is written for barrel, cabin, and pod saunas with electric or wood-fired heaters.
Disclaimer: This guide is general information only, not medical advice and not a substitute for local building codes or a licensed professional. Check your local permit and code office before structural or electrical work, and use licensed electricians and plumbers for installation work. If you are pregnant, live with a heart or circulation condition or low blood pressure, or take medication that affects heat tolerance, check with a doctor before using a sauna.


Paid Links - As an Amazon Associate, I earn from qualifying purchases.
Why an Outdoor Sauna Needs a Calendar, Not Just a Clean
Indoor saunas stay dry and sheltered. Outdoor saunas do not. Their outer shell faces weather all year, while the inside swings between damp and very hot. That combination is what shortens timber life if it is ignored.
The good news is that most damage announces itself early. A stained board, a loose shingle, a musty smell, or a stone that crumbles in your hand are all warnings. Catch them on a routine check and the fix is usually small.
Think of maintenance in three layers. The shell keeps weather out. The interior stays clean, dry, and safe to sit in. The heater and stones deliver steady, even heat. Each season stresses a different layer most, which is why a calendar works better than a single annual blitz.
The Year at a Glance
Spring is for inspection and deep cleaning after winter. Summer is the best window for exterior wood treatment, when boards are dry and warm. Autumn is for weatherproofing before the wet and cold arrive. Winter is for snow care, gentle heating, and watching for damp.
After every session, whatever the season, leave the door ajar for a while once the sauna has cooled enough to handle safely, so moisture can escape. Wipe up standing water and hang towels outside the hot room. These two habits prevent more mould and odour than any cleaning product.

Spring: Inspect, Clean, and Reset After Winter
Start spring with a slow walk around the whole sauna. Look at the roof, the base, the door seal, and every exterior board. Note anything cracked, lifted, stained, or soft before you start cleaning, so nothing gets washed over and forgotten.


Paid Links - As an Amazon Associate, I earn from qualifying purchases.
- Clear leaves, debris, and soil away from the base so water can drain and air can move underneath.
- Check the roof for lifted shingles, damaged felt, or standing water, and clear gutters and drip edges.
- Inspect the foundation and ground around it for pooling water or soil washed against the timber.
- Test the door: it should close snugly without forcing, and hinges and handles should move freely.
- Check vents for blockages from nests, leaves, or stored items.
Inside, vacuum benches, floors, and corners, then wipe boards with a damp cloth and a mild, sauna-safe cleaner. Follow your sauna maker’s guidance on cleaning products, and never use harsh chemicals on interior wood. Let the room dry fully with ventilation open before heating it again.
Spring is also the right time to inspect your heater stones properly. Lift them out once the heater is completely cold and switched off, or the fire is fully out and cold for a wood-fired stove. Look for cracks, crumbling edges, and dust, and set aside any damaged stones for replacement.
If your sauna sits on a raised base, check that the ground still slopes away from it. Water that pools against timber is the fastest route to rot. For a refresher on what sits underneath the sauna, see our guide to the best foundation for an outdoor sauna.
Summer: Wood Treatment Season
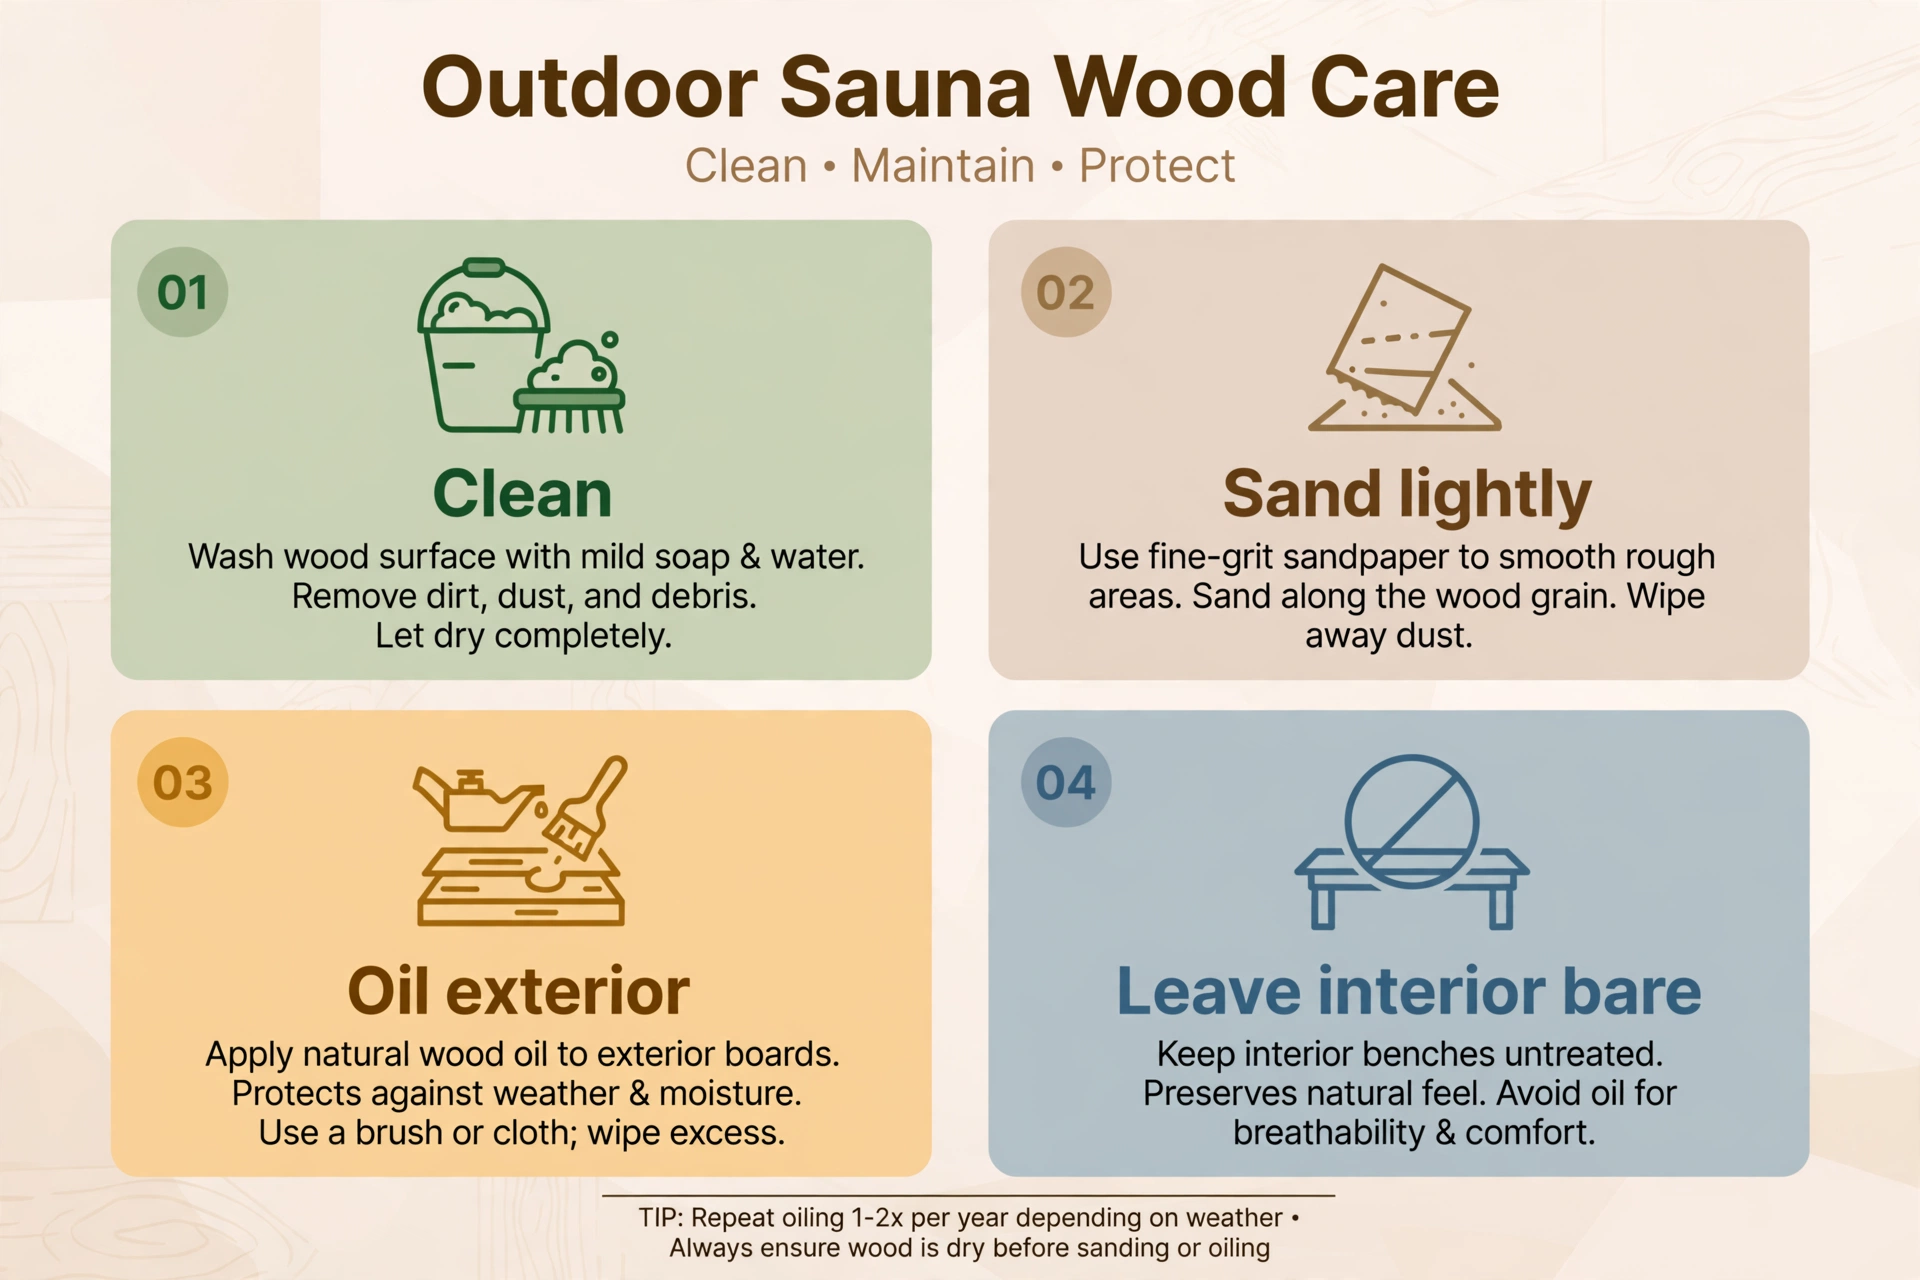
Summer is when exterior wood treatment belongs on the calendar. Warm, dry boards absorb oil or stain more evenly, and you have long daylight hours for the work to dry. Treat the outside only, and only when the forecast gives you a dry stretch.
Before treating, clean the exterior and let it dry fully. Light sanding removes greyed surface fibres and rough patches, but there is no need to sand healthy boards back to bare wood every year. Treat only what the season and the wood actually need.
- Clean exterior boards and let them dry completely before applying any finish.
- Sand lightly only where the surface is grey, rough, or flaking.
- Apply an exterior treatment your sauna maker approves, following the product instructions exactly.
- Work in the shade or on a mild day where possible, so the finish does not dry too fast or unevenly.
- Keep the finish off the roof flashing, vents, and door seals.
The interior is a different story. Benches, backrests, headrests, and interior wall boards should stay untreated, because bare skin sits directly against them and heat can draw finishes out of the wood. If an interior board is stained, sand it lightly rather than coating it.
Wood choice affects how often treatment is needed. Thermally modified timber, cedar, and spruce weather differently and need different care, so match your routine to your sauna’s wood. Our comparison of thermowood vs cedar vs spruce for outdoor saunas explains how each behaves outdoors.
Autumn: Weatherproof Before the Wet Arrives
Autumn is preparation season. Every job you do now pays off through winter, when repairs are colder, wetter, and harder. Work through the shell from the top down, so nothing is missed.
Start with the roof, because a small roof leak becomes a big timber problem over winter. Check shingles, felt, seams, and any penetrations for the chimney or vent. Clear gutters and make sure downpipes carry water away from the base, not beside it.
Next, check the door and window seals. Gaps let in wind-driven rain and let heat out, which makes winter sessions slower and costlier. Replace worn seals before the first frost rather than after it. Also clear the path to the sauna and plan where snow will be piled so it is never banked against the walls.
- Re-check the roof, gutters, and drainage after the first heavy autumn rain.
- Trim back branches that overhang the roof or drop heavy leaf fall onto it.
- Store firewood under cover, away from the sauna walls, if you have a wood-fired stove.
- Check the chimney cap and flue for debris before the heating season begins.
- Test lights, heater controls, and any outdoor power supply, and call a licensed electrician for any fault.
Winter: Snow, Heating, and Damp Watch
Winter care is mostly about snow and moisture. Brush snow off the roof after heavy falls rather than letting it sit, melt, and refreeze. Keep vents clear, because a blocked vent traps damp air inside and starves a wood-fired stove of air.
Heat the sauna gradually in cold weather and give it time to come up to temperature. A cold-soaked sauna that is forced hot too fast puts stress on timber and heater parts alike. Keep sessions short in deep cold, especially if you are new to winter sauna use.
Safety basics matter most in winter, when the contrast between hot room and cold air is greatest. Hydrate before and after, skip alcohol before and during sessions, and leave immediately if you feel dizzy or unwell. Children, older users, and anyone with a health condition should be extra cautious and seek medical advice first.
For a deeper winter routine, including heating and snow tips specific to cold months, see our guide to using an outdoor sauna in winter.
Heater Stones: When to Replace Them
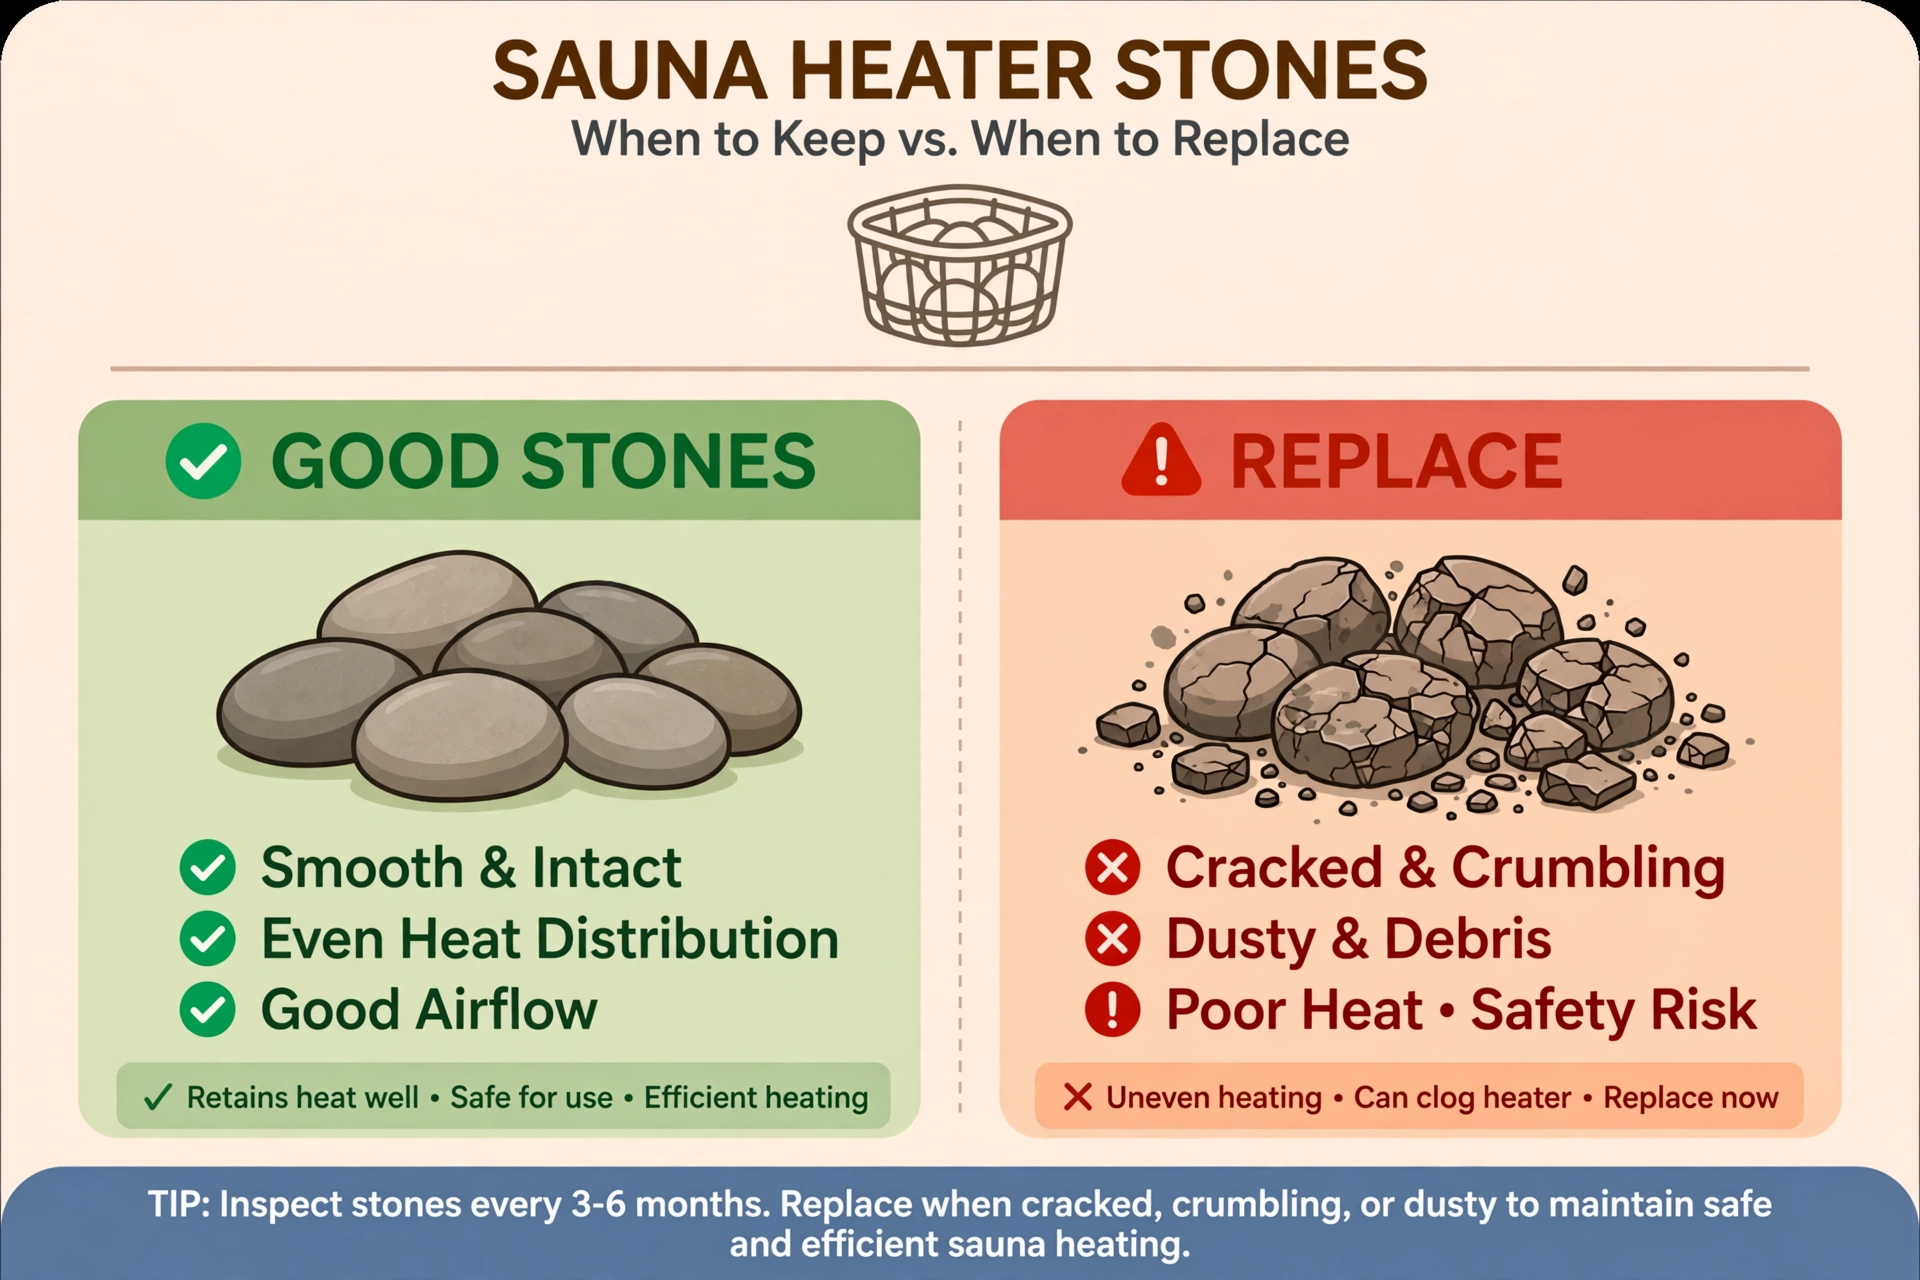
Heater stones are not decoration. They store heat and spread it evenly, and they take a beating from repeated heating, cooling, and water thrown on them. Over time they crack, crumble, and shed dust, and that changes how your sauna heats.
Inspect stones at least once a year, and more often if you sauna several times a week. Always work on a completely cold heater. Remove the stones, brush off loose dust outdoors, and check each one by hand and eye.
- Replace: stones that are cracked, split, crumbling, or shedding noticeable dust.
- Replace: stones that have become small fragments, which can pack together and block airflow.
- Keep: stones that are whole, firm, and roughly the size your heater maker specifies.
- Check: stones at the bottom of the basket, where heat and weight cause the most wear.
When you restack, place larger stones at the bottom and smaller ones on top, loosely enough that air can move between them. Packing stones tightly together restricts airflow and strains the heating elements. Always use the stone size and type your heater manufacturer recommends, and never use ordinary garden or river stones, which can crack or burst when heated.
Heater type changes the details of this job. Wood-fired stoves need ash and chimney care alongside stone checks, while electric heaters need their elements and wiring left strictly to qualified help. If you are choosing between the two, our wood-fired vs electric outdoor sauna heater guide compares how they differ in daily use.
Wood-Fired Stove Care Through the Year
Wood-fired outdoor saunas add fire care to the calendar. Keep clearances exactly as your stove and sauna makers instruct, and never stack wood, towels, or anything flammable against the stove or flue. Never leave a lit stove unattended.
Empty ash only when it is completely cold, and store it in a metal container away from timber and buildings. Check the chimney and flue regularly for soot and creosote build-up, and have it swept by a qualified sweep on the schedule your stove maker recommends. A blocked or damaged flue is a safety issue, not a cosmetic one.
Burn only dry, untreated wood that suits your stove. Wet or treated wood smokes heavily, coats the flue faster, and heats poorly. If you smell smoke inside the sauna room when the stove is running, stop using it and investigate before your next session.
Electric Heater and Safety Checks
Electric outdoor saunas need less hands-on fire care but the same discipline about safety. Check controls, timers, and thermostats for normal operation each season, and watch for any burning smell, tripped breaker, or damaged cable. Any electrical fault is a job for a licensed electrician, never a do-it-yourself repair.
Keep the heater area clear of towels, buckets, and loose items. Make sure the safety guard, where fitted, is secure and undamaged. If your heater has a remote or timer start, follow the maker’s safety instructions and never pre-heat an unchecked room.
Cleaning Routine: Weekly, Monthly, and Yearly
Seasonal jobs sit on top of a small regular routine. Weekly, wipe benches and sweep the floor after sessions, and leave ventilation open until the room is dry. Monthly, check for musty smells, stains, or soft boards, and clean the floor drain or gap where fitted.
Yearly, do the full spring inspection described above, including stones, roof, base, and seals. Keep a simple log of what you did and when: a notebook by the sauna door is enough. A log makes it easy to spot a board that keeps staining, a seal that keeps failing, or stones that wear faster than expected.
If mould appears, act promptly but gently. Ventilate, clean with a sauna-safe product, and find the moisture source rather than just bleaching the stain. Mould that keeps returning usually means a ventilation, drainage, or leak problem that cleaning alone will not fix.
Common Mistakes That Shorten a Sauna’s Life
- Oiling interior benches, which can irritate skin and trap heat-released finishes against the body.
- Banking soil, snow, or firewood against the walls, which holds moisture against the timber.
- Sealing vents to “keep the heat in,” which traps damp air and encourages mould.
- Ignoring a small roof leak until the timber beneath it softens.
- Reusing cracked stones until airflow fails and heating turns uneven.
- Leaving the sauna shut and damp between sessions for weeks at a time.
Your Printable Seasonal Checklist
Use this as your standing checklist. Tick each job off as you do it, and carry anything unfinished into the next month rather than dropping it.
- Spring: full inspection, deep clean, stone check, drainage and roof check.
- Summer: exterior wood treatment, light sanding where needed, vent and seal check.
- Autumn: roof and gutter check, seal replacement, chimney check, snow plan.
- Winter: snow clearing, vent clearing, gradual heating, damp watch.
- Every session: wipe up water, ventilate until dry, keep heater area clear.
- Every year: stone inspection, heater safety check, written log update.
An outdoor sauna rewards steady, small attention far more than occasional big efforts. Follow this calendar, keep water out and air moving, and your sauna should stay safe, sweet-smelling, and enjoyable for many seasons to come.
Frequently Asked Questions
How often should I replace sauna heater stones?
Inspect your stones at least once a year and replace any that are cracked, crumbling, or shedding dust. Stones that break down can block airflow around the heater, so replace them with the size and type your heater manufacturer recommends.
Should I oil the inside of my outdoor sauna?
No — leave benches, backrests, and interior wall boards untreated so bare skin never contacts a finish. Oil or stain is for exterior boards only, and only with a product your sauna maker approves for outdoor sauna use.
What is the most important seasonal job for an outdoor sauna?
Keeping water out and air moving. A sound roof, clear drainage, and a dry interior after each session prevent most rot, mould, and odour problems before they start.
Can I use my outdoor sauna in winter?
Yes, if the heater, roof, and access path are in good order and snow is cleared from vents and the roof. Heat up gradually, keep sessions short, and step out at once if you feel dizzy or unwell.