
An outdoor sauna in winter is a very different experience from the same sauna in summer. The air is colder, the wood is colder, the heater has more work to do, and snow changes how you look after the building itself. With a little planning, though, winter can be one of the most enjoyable times to use an outdoor sauna — provided you respect the cold as much as you enjoy the heat.
This guide covers what actually changes in winter: longer heating times, snow load on the roof, frozen water and door seals, and how wood-fired and electric heaters behave when the temperature drops. It also covers a simple pre-heating routine and a safe way to cool down afterwards, without rushing back into freezing air.
Please note: This article is for general information only and is not medical advice. Saunas are wellness tools, not treatments, and they do not cure, detox, or prevent disease. If you are pregnant, live with a heart or circulation condition, have low blood pressure, or take medication that affects heat tolerance, check with your doctor before using a sauna. Hydrate before and after, start with short sessions, and leave immediately if you feel dizzy, unwell, or overheated. Do not drink alcohol before or during a session.


Paid Links - As an Amazon Associate, I earn from qualifying purchases.
Why winter changes everything about an outdoor sauna
In summer, an outdoor sauna starts from a warm baseline. The timber, the benches, and the air inside are already mild, so the heater only has to lift the temperature the rest of the way. In winter, every part of the sauna starts cold, and the heater is also fighting heat loss through the walls, roof, and door while it works.
That does not mean a winter sauna is a problem. It simply means you should allow more time, check a few things before you light or switch on the heater, and expect the first session of a cold spell to feel different from a session after the sauna has been used recently. A sauna that has been warmed up in the last day or two will usually feel quicker to heat than one that has sat unused through a long freeze.
Winter also changes the world around the sauna. Paths get icy, buckets freeze, door seals can stick, and snow builds up where you might not think to look. Most winter sauna trouble is not dramatic — it is small, avoidable friction that a short routine prevents.
Heating times in cold weather: what to expect
Heating typically takes noticeably longer in sub-zero weather than it does in mild weather. How much longer depends on the size of the sauna, how well it is insulated, the type and power of the heater, how cold it is outside, and whether wind is stripping heat from the building. There is no single reliable number that fits every outdoor sauna, so be wary of any guide that promises one.
As a practical rule, start earlier than you think you need to. If your sauna normally feels ready in a comfortable amount of time in summer, give it generous extra time on a cold day, and more again on a bitterly cold or windy day. It is far better to arrive to a sauna that is ready and holding steady than to sit shivering on a cold bench waiting for the thermometer to climb.
- Size matters. A small sauna heats faster than a large one, all else being equal, because there is less air and less timber to warm.
- Insulation matters more in winter. A well-insulated sauna holds its heat; a thin-walled or draughty one loses it almost as fast as the heater makes it.
- Wind is a hidden heater tax. An exposed sauna on a windy day will take longer than the same sauna sheltered by a fence, hedge, or wall.
- Cold timber absorbs heat. The benches and walls soak up warmth before the air feels fully hot, which is why the thermometer can rise before the benches feel comfortable.
- Repeated use helps. A sauna used regularly through winter often feels quicker to bring up to temperature than one left cold for weeks.
Watch the thermometer, but also trust the benches. Sit briefly on a lower bench first and let your body adjust. If the air feels hot but the wood still feels icy, give it a little longer — a comfortable winter session comes from warm timber as well as warm air.


Paid Links - As an Amazon Associate, I earn from qualifying purchases.
A simple winter pre-heating routine
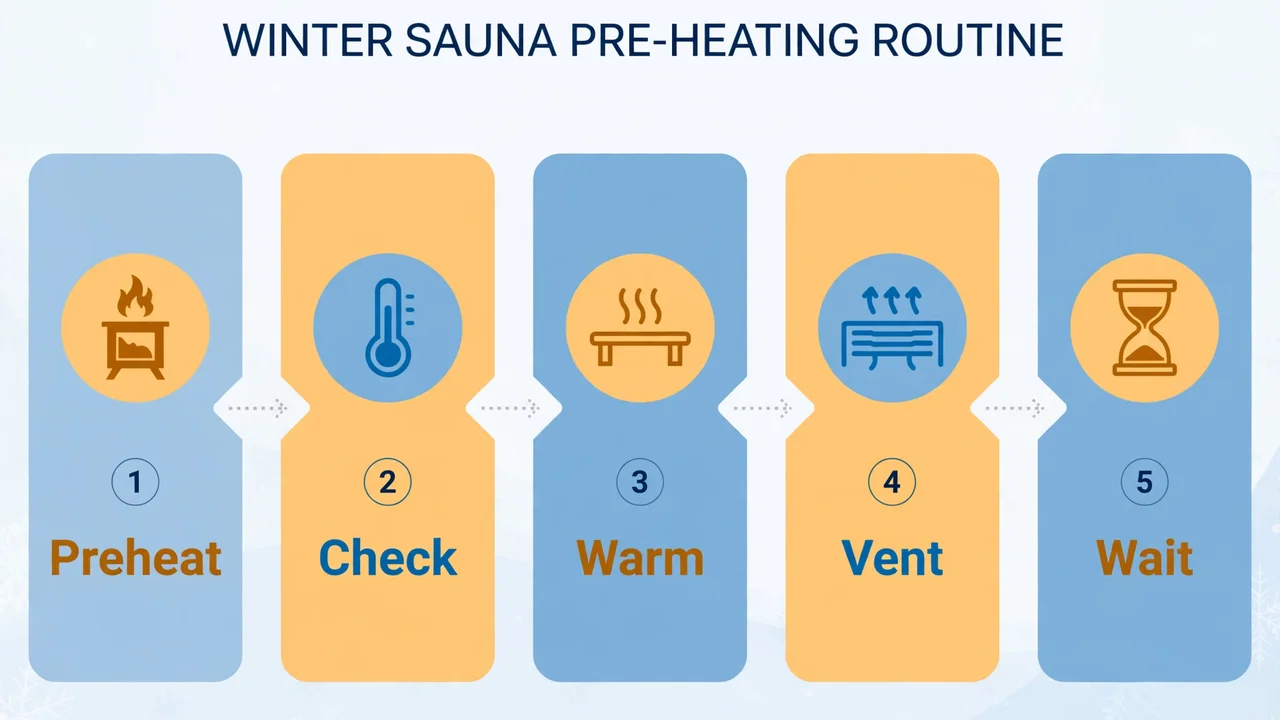
A repeatable routine takes the guesswork out of winter sauna use. It also gives you a natural moment to check the things that cold weather affects most: the path, the door, the chimney or heater, and the water.
- Clear the path first. Make sure the walk to the sauna, the steps, and the area in front of the door are clear of snow and ice before you heat anything. You will be barefoot or in light footwear later, and you do not want to deal with ice then.
- Check the door. Open it gently. If a seal has frozen shut, do not force it — ease it free and check for ice or snow packed around the frame.
- Look inside before heating. Check for snow or water that has blown in, damp patches, or anything stored in the sauna that should not be there. Make sure vents are not blocked by snow or stored items.
- Start the heater as the manufacturer directs. For wood-fired heaters, use only the fuel the manufacturer specifies and follow its lighting instructions. For electric heaters, follow the manufacturer’s controls and safety instructions.
- Let the sauna warm through, not just the air. Give the benches and walls time to absorb heat. A short wait at this stage makes the whole session more comfortable.
- Prepare water indoors. Fill your bucket and ladle inside, where water will not freeze on the way, and bring them out only when you are ready to use them.
- Do a final comfort check. Step in briefly, check the benches, the thermometer, and the ventilation, and only then settle in for your session.
Wood-fired vs electric heaters in the cold
Both wood-fired and electric heaters can work well in winter, but they behave differently when it is cold, and each asks something different of you. Understanding that difference helps you choose, and helps you plan your heating time honestly.
A wood-fired heater gives you direct control: you can build the fire up more strongly on a very cold day, within the manufacturer’s instructions. The trade-off is attention. A wood fire needs tending, it needs dry fuel stored somewhere it will stay dry, and it must never be left unattended. Damp or snow-covered wood burns poorly and smokes more, so winter fuel storage matters as much as summer fuel storage — arguably more.
An electric heater is simpler to start, especially on a dark winter evening: switch it on, set it as the manufacturer directs, and let it work. The trade-off is that it cannot be pushed beyond its rated output, so on an extremely cold day it will simply take the time it takes. That is normal, not a fault, and it is another reason to start early rather than expecting a quick heat-up.
Whichever heater you have, keep clearances exactly as the manufacturer specifies, keep combustible materials away from the heater, and never improvise with a heater, its controls, or its flue. If anything about the heater, its wiring, or its chimney looks damaged, unusual, or unsafe, do not use it until a qualified professional has checked it. For a fuller comparison of the two heater types, see wood-fired vs electric outdoor sauna heaters.
Chimney and ash care in winter
Winter is not the time to neglect chimney care. Cold starts, damp fuel, and heavier use can all increase soot build-up, and a blocked or damaged flue is a safety issue, not just an efficiency issue. Follow the manufacturer’s cleaning and inspection guidance, and arrange professional sweeping or inspection at the intervals it recommends.
Handle ash with the same care in winter as in summer. Ash can stay hot far longer than people expect, and it must never be tipped onto snow, leaves, or into a bin while there is any chance of embers remaining. Use a metal container with a lid, keep it away from the sauna and other buildings, and only dispose of ash once it is completely cold.
Snow load: the roof problem most people overlook
Snow looks light when it falls, but it does not stay light. Fresh, fluffy snow is one thing; wet snow, refrozen snow, and layers of ice are far heavier, and they accumulate exactly where a sauna roof is least able to shrug them off if the roof is flat or shallow-pitched. This is the part of winter sauna care that protects the building itself.
Always follow your sauna manufacturer’s guidance for snow load and roof care, including any maximum snow depth or clearing instructions it gives. Different roof shapes, spans, and materials have different limits, and a generic article cannot replace the guidance for your specific building. If you do not have that guidance, contact the manufacturer or supplier before a heavy winter, not after one.
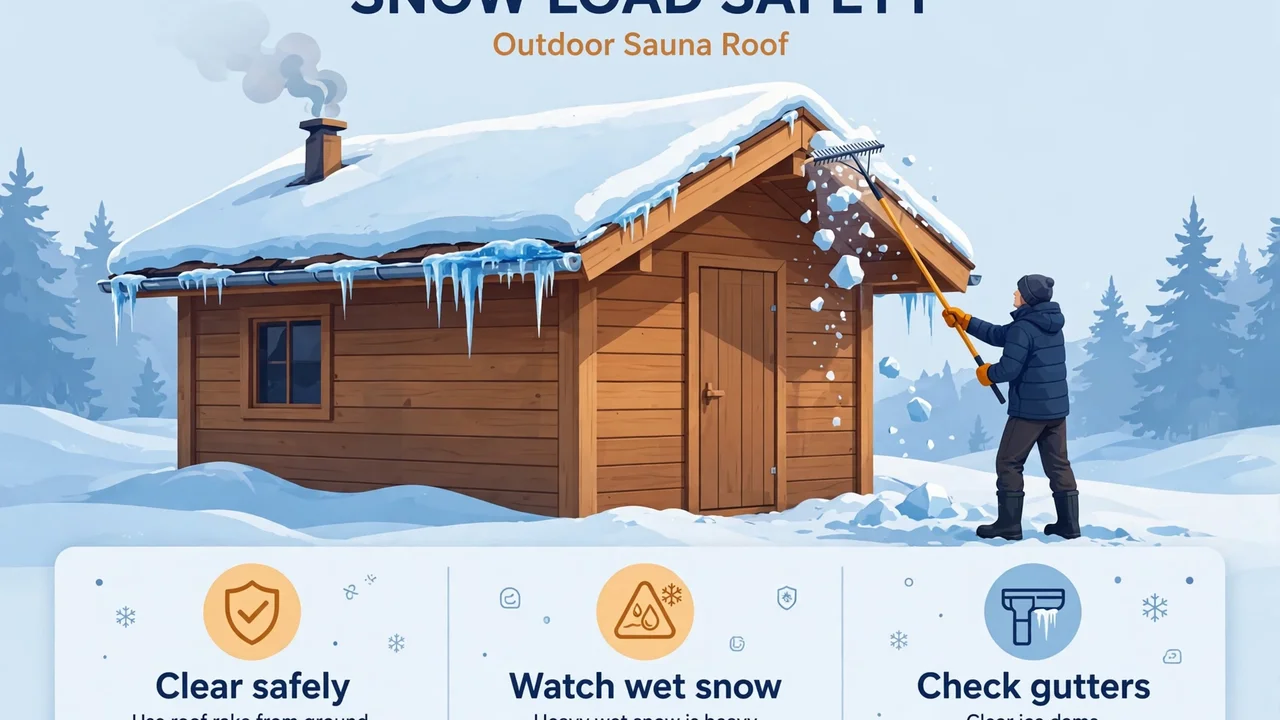
- Watch wet snow especially. A modest-looking layer of wet, heavy snow can weigh far more than a deep layer of dry powder.
- Watch for uneven build-up. Drifting snow can pile up on one side of a roof or against a wall, loading the structure unevenly.
- Watch for ice dams and icicles. Meltwater that refreezes at the eaves can trap water behind it and add weight, and large icicles above a doorway are a hazard in themselves.
- Check after storms, not just during them. A calm day after heavy snowfall is the right time for a careful look at the roof, gutters, and the ground around the sauna.
How to clear a sauna roof safely
Never climb onto a snowy, icy sauna roof to clear it. Falls from even a low roof onto frozen ground can cause serious injury, and walking on a loaded roof can damage it. Clear snow from the ground where possible, using a long-handled roof rake designed for the job, and work in a way that keeps you clear of falling snow and ice.
Clear snow gradually and evenly rather than stripping one side bare while the other stays loaded. Avoid metal tools that can gouge roofing material, and do not use sharp implements to chip ice off a roof surface. If the snow is very deep, very icy, or the roof shows any sign of sagging, cracking, or distress, stop, keep people away from the building, and get professional advice before using the sauna.
Also clear snow away from vents, the door, and any air intakes, and keep gutters and drainage paths open so meltwater can run away from the building rather than pooling against its base. Standing meltwater that refreezes around the foundation can cause its own problems over a winter. If you are still planning the base for a sauna, our guide to the best foundation for an outdoor sauna explains why drainage and a stable, dry footing matter so much.
Doors, seals, and draughts
Doors take a beating in winter. Seals contract in the cold, hinges stiffen, and meltwater that runs into a frame can freeze overnight and glue a door shut. A door that will not close properly then leaks heat for the whole session, which makes heating times longer and the sauna less comfortable.
Check seals before the coldest weather arrives. Look for cracks, gaps, or sections that have gone hard or flattened, and replace worn seals with parts that match your sauna’s make and model. Keep the threshold and frame clear of snow and ice, and wipe away meltwater when you can so it does not freeze in place overnight.
If a door has frozen shut, do not force it or hang your weight on the handle — you risk tearing a seal or damaging a hinge. Warm the frame gently, clear ice from around it, and ease it open. A small amount of prevention here, done in autumn, saves a surprising amount of frustration in January.
Water, buckets, and freezing: the small things that matter
Water is the quiet winter enemy of an outdoor sauna. A bucket left outside overnight will freeze, a ladle left in a frozen bucket can crack, and water left in a container inside a cold sauna can freeze, expand, and damage the container. None of this is dangerous in itself, but it is wasteful and annoying, and it can damage accessories over a season.
- Empty buckets and ladles after each session and store them somewhere they will not freeze solid — indoors is simplest.
- Do not leave water sitting in the sauna between sessions in freezing weather.
- Bring fresh water out only when you need it, and take accessories back inside afterwards.
- Check wooden buckets for cracks or leaks at the start of winter; cold and drying can open up joints that were fine in summer.
- If you use a cold plunge or outdoor shower nearby, follow the same rule: drain and protect pipes and fittings that could freeze, and follow the manufacturer’s winter guidance for that equipment.
If you enjoy contrast therapy — a hot sauna followed by a cold plunge — winter changes the cold side of the equation too, because the plunge and the air around it are already very cold. Read our guide to backyard contrast therapy with an outdoor sauna and cold plunge before combining the two, and be especially conservative with cold exposure on your first winter sessions: keep cold plunges brief, never plunge alone, and warm up gradually afterwards.
Staying comfortable during a winter session
Winter sessions reward a slower start. Step in, sit on a lower bench, and let your body adjust to the heat before moving higher, where it is hotter. Keep sessions shorter than you might in summer at first, especially if you have not used the sauna for a while, and build up gradually over the season rather than trying to match a summer session on a freezing day.
Hydration matters in winter just as much as in summer, even though you may not feel as thirsty in cold air. Drink water before your session and again afterwards, and keep water nearby during longer sessions. Avoid alcohol entirely before and during sauna use — it impairs judgement and affects how your body handles heat and cold, which is a dangerous combination in winter.
Wear something on your feet for the walk to and from the sauna, and have a warm robe, towel, and dry footwear ready for afterwards. The moments just after a session, when you are warm and damp, are when cold air bites hardest. Plan that transition in advance instead of improvising it while you are already cold.
Cooling down safely in cold air
Stepping straight from a hot sauna into freezing air feels bracing, and for many people it is part of the appeal. It still deserves respect. Cool down gradually: step out, breathe normally, and let your body adjust for a short while in the shelter of the sauna porch or a covered area before standing in open wind or rolling in snow.
Never go from a hot sauna straight into an icy plunge or snow roll if you feel dizzy, unwell, or unusually breathless, and never do cold exposure alone. If you feel faint at any point, sit or lie down, get warm and dry, drink water, and do not go back into the heat. Seek medical help promptly if symptoms do not pass quickly.
Dress warmly immediately after cooling down, even if you feel warm at first. That warmth fades quickly in winter air, and damp skin and hair lose heat fast. A warm drink, dry clothes, and a few minutes indoors complete the session far better than lingering outside in wet swimwear.
Build, installation, and winter planning notes
If you are planning an outdoor sauna with winter use in mind, a few choices made at the start pay off every cold season. Good insulation, a roof pitch that sheds snow, a sheltered position out of the prevailing wind, a dry and well-drained base, and a door that seals well are all worth more in January than they appear to be worth on a summer drawing.
General guidance only: Build and installation advice in this article is general information, not a substitute for your local building code, permit requirements, or a licensed professional’s advice. Check with your local code and permit office before building, and use licensed electricians and plumbers for electrical and plumbing work. Rules vary by location, so what is permitted in one area may not be permitted in another.
Before you build, it is worth checking whether your area requires a permit at all — see do you need a permit for an outdoor sauna — and getting a realistic sense of overall costs, including insulation and a suitable base, in our outdoor sauna cost guide.
If your sauna is already built, winter preparation is still worthwhile. A pre-winter check — roof, seals, drainage, heater, chimney, and fuel storage — done once in autumn will catch most problems while they are still easy to fix, rather than in the middle of a cold snap when nobody wants to be working outside.
Winter sauna checklist
Keep this short checklist by the sauna door through winter. It is not a substitute for your manufacturer’s manual, but it covers the checks that prevent most cold-weather frustration.
- Path, steps, and doorway clear of snow and ice
- Roof checked after storms; wet snow and ice at the eaves watched
- Door opens freely and seals properly
- Vents clear of snow and stored items
- Heater and chimney checked per manufacturer guidance; ash fully cold before disposal
- Dry fuel stored under cover (wood-fired) or controls checked (electric)
- Bucket emptied after each session; fresh water brought out only when needed
- Warm robe, towel, and dry footwear ready before the session starts
- Water to drink before and after; no alcohol before or during
- Never use the sauna alone when trying cold plunges or snow exposure for the first time
Conclusion
Winter does not stop an outdoor sauna from working well — it just asks for more time, more attention to snow and ice, and more respect for the cold on both sides of the session. Start the heater early, clear the roof safely from the ground, protect doors and water from freezing, and cool down gradually instead of rushing into freezing air.
Done that way, a winter sauna is not a chore to endure. It is a warm, quiet room in the middle of a cold landscape — and that contrast is exactly why so many outdoor sauna owners say winter is their favourite season to use one.
Frequently asked questions
How long does an outdoor sauna take to heat in winter?
Heating typically takes noticeably longer in sub-zero weather than in mild weather, because the timber, benches, and air all start cold and the heater loses heat to the cold outside. The exact time depends on the sauna’s size, insulation, heater type and power, wind exposure, and how cold it is, so allow generous extra time and start earlier than you would in summer.
Can you use an outdoor sauna in snow?
Yes, outdoor saunas are designed to be used year-round, including in snow, provided the sauna is in good condition and you follow the manufacturer’s guidance. Clear the path and doorway of snow and ice, check the roof after storms, and make sure vents and the door are not blocked by snow.
How do I clear snow off my sauna roof safely?
Clear snow from the ground using a long-handled roof rake, never by climbing onto a snowy or icy roof. Work gradually and evenly, avoid metal tools that can damage roofing, and do not chip ice off the roof surface. If the roof shows sagging or cracking, keep people away and get professional advice.
Do wood-fired or electric heaters work better in winter?
Both work well in winter, but differently. A wood-fired heater can be built up more strongly on a very cold day within the manufacturer’s instructions, but it needs tending and dry fuel, and must never be left unattended. An electric heater is simpler to start but cannot exceed its rated output, so it will simply take the time it takes on an extremely cold day.
Why does my sauna door stick in winter?
Doors stick in winter when seals contract in the cold, hinges stiffen, or meltwater freezes in the frame overnight. Check seals before cold weather, keep the threshold clear of snow and ice, and ease a frozen door open gently rather than forcing it, which can tear a seal or damage a hinge.
Should I leave water in my sauna bucket over winter?
No. Empty buckets and ladles after each session and store them where they will not freeze solid. Water left in a container inside a cold sauna can freeze, expand, and damage the container, and a frozen bucket is of no use for your next session.
Is it safe to cool down in cold air after a sauna?
Cool down gradually rather than stepping straight from a hot sauna into freezing air or an icy plunge, especially if you feel dizzy or unwell. Never do cold exposure alone, and if you feel faint, get warm and dry, drink water, and do not go back into the heat. Seek medical help promptly if symptoms do not pass quickly.