
Your sauna used to reach its set temperature in twenty minutes. Now it takes forty, one corner of the bench stays cool, and the panel behind your back feels lukewarm while the others glow. Nothing has changed about how you use the sauna, so the change is almost certainly inside the cabin. In most cases like this, the heater panels are the part that has aged.
Infrared sauna heater panels are the working heart of the cabin. They turn electricity into the gentle radiant heat you feel on your skin, and they do it for thousands of hours before they start to fade. When they do fade, they rarely fail all at once. They lose output slowly, one panel at a time, which is why so many owners spend months wondering whether the sauna is broken or whether they are imagining it.
This guide is about the panels themselves: the three types you will find in home saunas, how long each type usually lasts, the warning signs that a panel is failing, how to test one safely, and what a replacement should cost. It is not a general maintenance guide and it is not a buying guide for a new sauna. For the wider upkeep routine, our infrared sauna maintenance calendar sets out what to check each month and each year, and the panel checks below fit neatly into that schedule.
Please note: This article is general guidance only, not a substitute for your manufacturer’s manual or a licensed professional. Costs in this guide are planning estimates, not quotes, and they vary by region, brand and installer, so get local quotes before you buy. Check your local code and permit office, and use a licensed electrician for any wiring work. Always disconnect power before inspecting a panel, and never open a live panel. Saunas are wellness tools, not treatments. Hydrate before and after, start with short sessions, and leave immediately if you feel dizzy or unwell. If you are pregnant, live with a heart or circulation condition or low blood pressure, or take medication that affects heat tolerance, check with your doctor before using a sauna.


#Paid Links
What Infrared Sauna Heater Panels Actually Do
A heater panel is a flat heating element mounted on the cabin wall, under the bench, or behind the backrest. When you switch the sauna on, current flows through the element and the panel surface warms up. That surface then gives off infrared radiation, which warms your skin and the bench directly rather than only warming the air first. This is why an infrared cabin can feel warm even before the air temperature has climbed very far.
Most home cabins have between four and eight panels, arranged so that heat reaches your front, back, legs and sides. Each panel is wired back to a controller, usually through a junction box or a wiring loom behind the wall. The controller switches panels on and off to hold the temperature you set. Because the panels share the work, one weak panel does not always stop the sauna. It just leaves a cool patch, and the other panels run longer to make up the difference.

#Paid Links
Carbon panels: the quiet workhorse
Carbon panels use a thin layer of carbon fibre or carbon film spread across a large flat surface. Because the heating area is wide, the surface temperature stays relatively even, and the heat feels soft and spread out. They are the most common panel type in modern home saunas, and they are the type most owners will be replacing if their cabin is less than ten years old.
Ceramic panels: hot, focused and older in design
Ceramic panels use a ceramic rod or tube, sometimes with a metal reflector behind it, to produce a more focused beam of heat. They run hotter on a smaller surface than carbon panels, and you can often feel the difference as a clear warm spot when you sit in front of one. Many older cabins and budget models use ceramic panels, and they are still sold as replacement parts for those models.
Full-spectrum panels: two heaters in one housing
Full-spectrum panels combine two heating technologies in one unit, usually a carbon panel for longer-wave heat and a short-wave element, often a quartz or halogen tube, for the nearer part of the spectrum. The idea is to cover a wider range of wavelengths from a single fitting. They are common in premium cabins and in models marketed for a stronger heat feel at the same air temperature.
| Panel type | How it heats | Heat feel | What usually fails first |
|---|---|---|---|
| Carbon | Wide carbon film across a flat panel | Soft, even, spread out | Patchy output or a dead zone on the panel face |
| Ceramic | Ceramic rod or tube, often with a reflector | Focused and intense in one spot | Hot spots, cracked rod, or a dull element |
| Full-spectrum | Carbon panel plus a short-wave tube | Strong and wide-ranging | One side fails while the other still works |
If you are not sure which type your cabin uses, the manual is the fastest answer. The model plate, usually inside the door frame or on the back of the cabin, gives the model number, and the manufacturer can confirm the panel type from that number alone. Do not guess from the shape of the panel, because different brands house similar elements in very similar casings. If you are choosing a whole new heater rather than a replacement panel, our guide on how to choose an infrared heater explains the trade-offs between panel types in more detail.


#Paid Links
How Long Do Infrared Sauna Heater Panels Last?
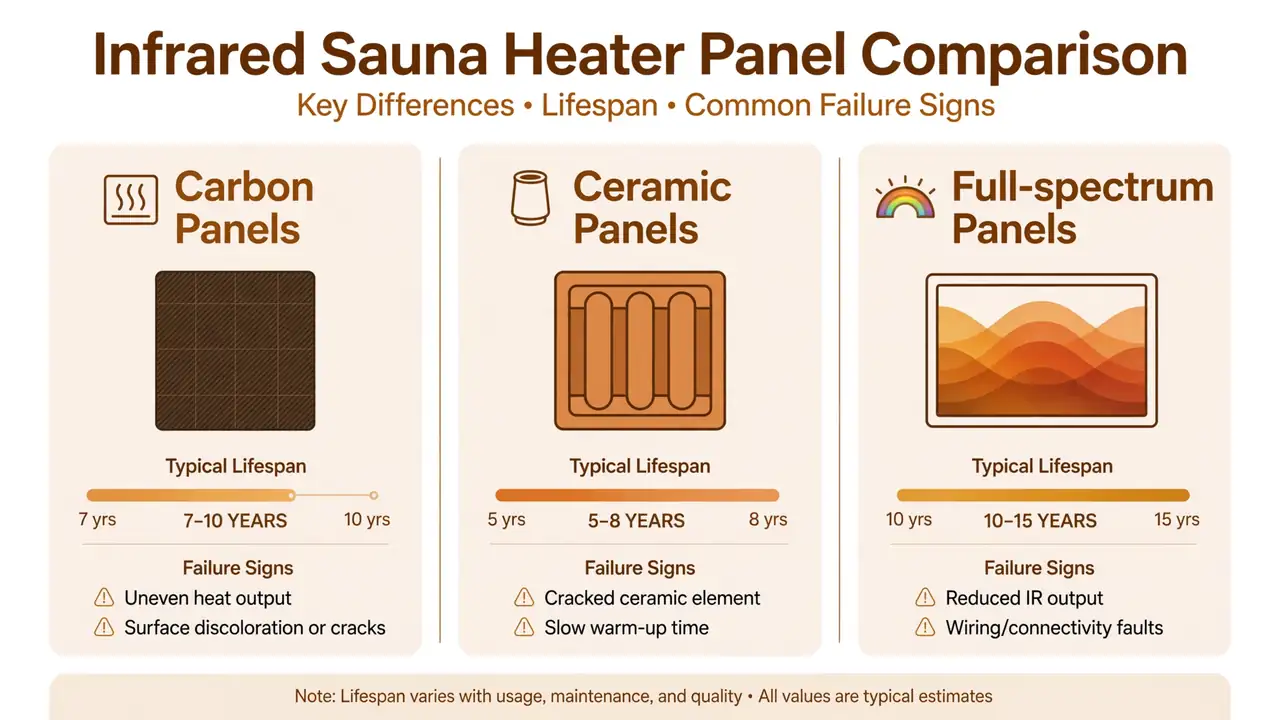
There is no single number for panel lifespan, and any source that gives one without qualification is oversimplifying. Panels age according to how often the sauna runs, how hot it runs, how well the cabin is ventilated, and how carefully the panels were made. The ranges below are the typical ranges manufacturers quote for home use. Treat them as planning figures, not guarantees, and expect real life to fall on either side.
| Panel type | Typical lifespan range (home use) | What the range assumes |
|---|---|---|
| Carbon | 10 to 20 years | Regular home use, a few sessions a week, set temperatures in the normal range |
| Ceramic | 5 to 10 years | Regular home use, with the element cycling on and off as the controller holds temperature |
| Full-spectrum | 8 to 15 years for the carbon side, shorter for the short-wave tube | The tube is a wear item and may need replacing before the carbon side |
What shortens a panel’s life
Moisture matters too. Infrared cabins are dry by design, but water splashed on a hot panel, a wet towel draped over a panel, or a cabin left damp after cleaning can all stress the element and its connections. Panels are built to cope with normal sauna humidity, not with direct water contact. Keep water, oils and cleaning sprays away from the panel faces, and let the cabin dry with the door open after cleaning.
What lengthens a panel’s life
Regular cleaning helps too, but only if it is gentle. Wipe panel faces with a dry or barely damp cloth when the cabin is cool and the power is off, and never use abrasive pads or solvents on a panel surface. A thin layer of dust is harmless, while a scratched or chemically damaged surface can create a hot spot. Keep a simple inspection in your routine, and the infrared sauna maintenance calendar shows where a quarterly panel check fits alongside the other jobs.
7 Warning Signs a Heater Panel Is Failing
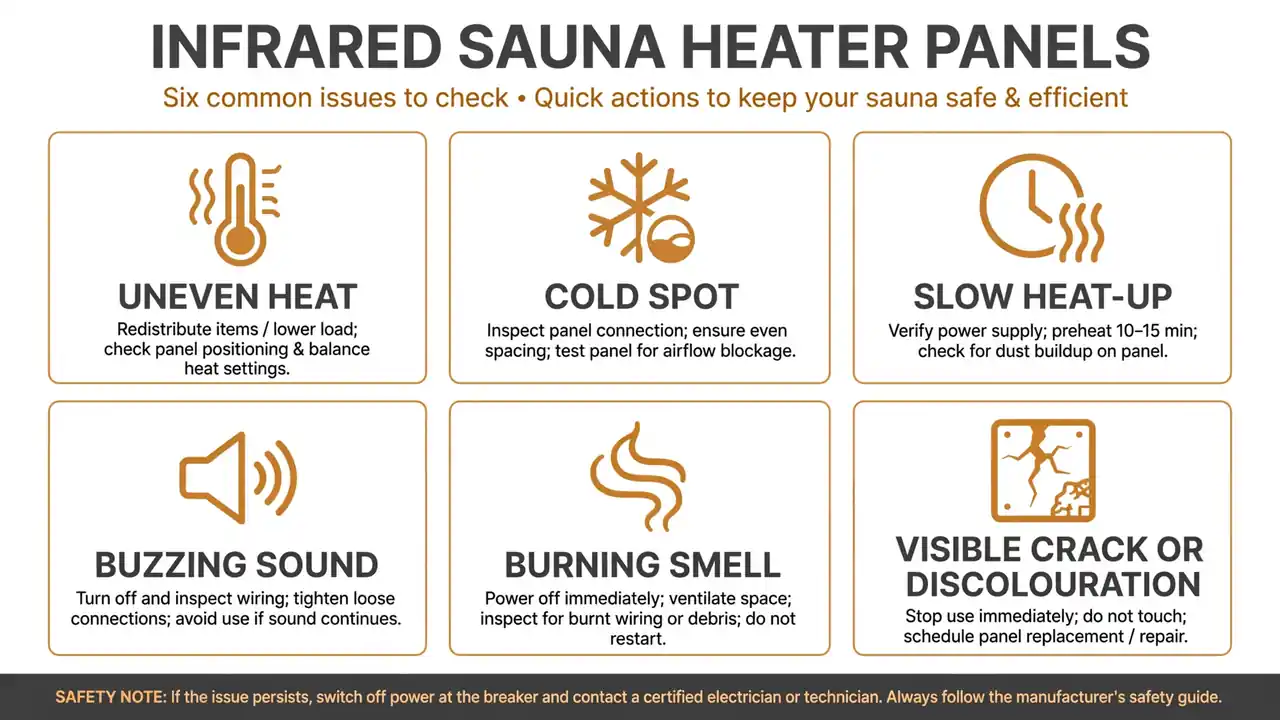
Panels rarely announce their failure with a single dramatic event. They give small, repeatable clues, and the pattern matters more than any one clue on its own. A single slow warm-up on a cold day means little. The same slow warm-up every session for three weeks means something. Work through the signs below in order, and note which ones your cabin shows before you decide what to do next.
- Uneven heat across the bench. One side of your body feels warm while the other stays cool, even after the cabin has been running for twenty minutes.
- A cold spot on one panel. Part of a panel face feels cool to the touch while the rest is warm, or a whole panel stays cool while its neighbours heat up.
- Slow heat-up. The cabin takes noticeably longer to reach your usual temperature than it did a few months ago, with no change in room temperature or door use.
- The set temperature is never reached. The display climbs, stalls below your setting, and stays there even with the door closed.
- Buzzing, clicking or humming from one panel. A new sound that follows one panel, especially a buzz that starts and stops with the heating cycle.
- A burning or chemical smell. A sharp smell that was not there before, or a smell that grows stronger as the cabin heats up.
- Visible damage. Discolouration, blistering, a crack in a ceramic element, a scorch mark, or a warped panel face.
Two of these signs deserve a special note. A burning smell is a stop-and-check signal, not a wait-and-see signal. Switch the sauna off at the control panel and at the breaker, let the cabin cool, and do not use it again until a professional has looked at it. A smell can come from dust burning off after a long idle period, which is harmless and fades quickly, but a smell that returns every session or grows stronger is not dust. Treat it as an electrical fault until proven otherwise.
Uneven heat and cold spots: the most common clue
Uneven heat is the sign most owners notice first, and it is also the easiest to test. After the cabin has run for at least fifteen minutes at your usual setting, hold the back of your hand a few centimetres from each panel in turn, moving slowly across the face. A healthy panel feels warm across its whole surface. A failing panel has a cool patch, or one edge that never warms up. Keep your hand moving and never press your palm flat against a hot panel.
How to Test a Heater Panel Safely
Testing a panel is mostly a matter of careful observation, and most of it needs no tools at all. The hands-on electrical tests exist, but they belong to qualified people. This section separates what you can safely check yourself from what you should leave to a professional, and it does so in the order you should work through the checks.
- Run the sauna and map the heat. Set your usual temperature, wait at least fifteen minutes, then check each panel face with the back of your hand held a few centimetres away. Note which panels feel even, which have cool patches, and which stay cold.
- Repeat the check on a second day. A one-off cold patch can be a draught or a door left ajar. The same result twice points at the panel.
- Rule out the simple causes. Check the door seal, close the vents to their normal position, and make sure nothing is covering a panel. If a panel warms up normally once the cover is removed, the panel was never the problem.
- Switch off and disconnect power, then look. With the power off at the breaker and the cabin cool, look at each panel face and its edges for discolouration, blistering, cracks, or scorch marks. Look at the visible wiring for melted insulation or loose connections, but do not tug on wires or open sealed housings.
- Check the manual for a panel test mode. Some controllers let you switch panels on one at a time for diagnosis. If your manual describes this, follow it exactly. If it does not, do not improvise a test mode.
- Stop at the edge of your skill. If the visual check finds damage, if a breaker trips, or if you need to open a junction box or use a multimeter on mains wiring, that is the end of the home checks. Call the manufacturer or a licensed electrician.
A note on multimeters, because many guides suggest them casually. A resistance check across a panel can confirm a dead element, but only when the panel is fully disconnected from mains power and only when the person testing knows how to use the meter safely on that circuit. If you are not confident about both of those conditions, skip the meter test entirely. A professional can run it in minutes, and guessing with mains electricity is never worth the saving.
Never test a panel while it is live and open. Never bypass a safety cut-out, a thermal fuse, or a controller interlock to force a panel on. Those parts exist to stop a fault from becoming a fire, and bypassing them removes the only protection between a failing panel and the wooden cabin around it. If a safety device has tripped, find out why it tripped before you reset it, and get help if the reason is not obvious.
Repair or Replace? Making the Decision
| Situation | Usual answer | Why |
|---|---|---|
| One panel is dead, the rest heat evenly, cabin is under five years old | Replace the one panel | The other panels have years of life left, and a single swap restores even heat |
| One panel is patchy, the rest are fine | Replace the one panel | Patchy output does not recover, and the panel will only get worse |
| Two or more panels are weak in an older cabin | Price a full set before deciding | Labour for one visit often covers several panels, so a set can cost less per panel |
| Panel is damaged, scorched, or smells of burning | Replace it, do not use the sauna until then | Damage is a safety matter, not a comfort matter |
| Loose wire or connector, element itself tests fine | Repair the connection, by a professional | The panel is healthy, and only the connection needs attention |
| Cabin is old, parts are discontinued, several panels are failing | Consider replacing the whole sauna | Chasing discontinued parts gets expensive, and the controller may be next to fail |
How a Heater Panel Is Replaced
A panel replacement is a straightforward job for someone who knows the model, and it is a job most owners should not attempt alone when wiring is involved. The steps below describe the job at a general level so you know what to expect, what to order, and where the boundary sits between owner work and electrician work. They are not a substitute for the instructions in your manual, and your manual always wins if the two disagree.
- Identify the exact part. Find the model number on the cabin plate and the part number in the manual or on the panel label. Confirm the panel type, wattage, and size with the manufacturer or an authorised parts supplier.
- Order the correct panel and any fittings. Ask whether the panel comes with its connector, screws, or a new gasket, and order those at the same time so the job is not held up by a small missing part.
- Disconnect power completely. Switch the sauna off at the control panel and at the breaker. Confirm the cabin is cool and the power is off before anyone touches a panel or a wire.
- Remove the old panel. This usually means removing a cover or a backrest, undoing the fixings, and unplugging the connector. Keep the screws and note how the panel was seated, because the new one goes back in the same way.
- Fit the new panel and reconnect it. Seat the panel evenly, refit the fixings, and reconnect the plug or terminals exactly as they were. If the wiring needs cutting, joining, or a new connection, a licensed electrician should do that part.
- Test before you sit in it. Restore power, run the sauna empty at a moderate setting, and check that the new panel heats evenly across its face and that no other panel has gone cold. Check for smells or sounds, and switch off at the breaker if anything seems wrong.
What Does Replacing Infrared Sauna Heater Panels Cost?
Panel replacement is usually a modest repair compared with the price of a new cabin, but the total depends on the panel type, how many panels need replacing, and whether you pay for professional fitting. The figures below are planning estimates in US dollars, based on the typical price bands for home sauna parts and local labour. They are not quotes. Prices vary by brand, region, and installer, and you should get local quotes and check current listings before you commit to a purchase.
| Job | Typical planning estimate (USD) | Notes |
|---|---|---|
| Single carbon panel, part only | 80 to 250 | Price rises with panel size and brand |
| Single ceramic panel or element, part only | 60 to 180 | Check whether the reflector or housing is included |
| Single full-spectrum panel, part only | 150 to 400 | Ask whether the short-wave tube is included or separate |
| Short-wave tube alone, part only | 40 to 120 | A wear item, often replaced before the carbon side |
| Professional fitting for one panel | 150 to 400 | Depends on access, location, and call-out fees |
| Full set of panels for a small cabin, parts only | 400 to 1,200 | Two-person cabins sit at the lower end, larger cabins higher |
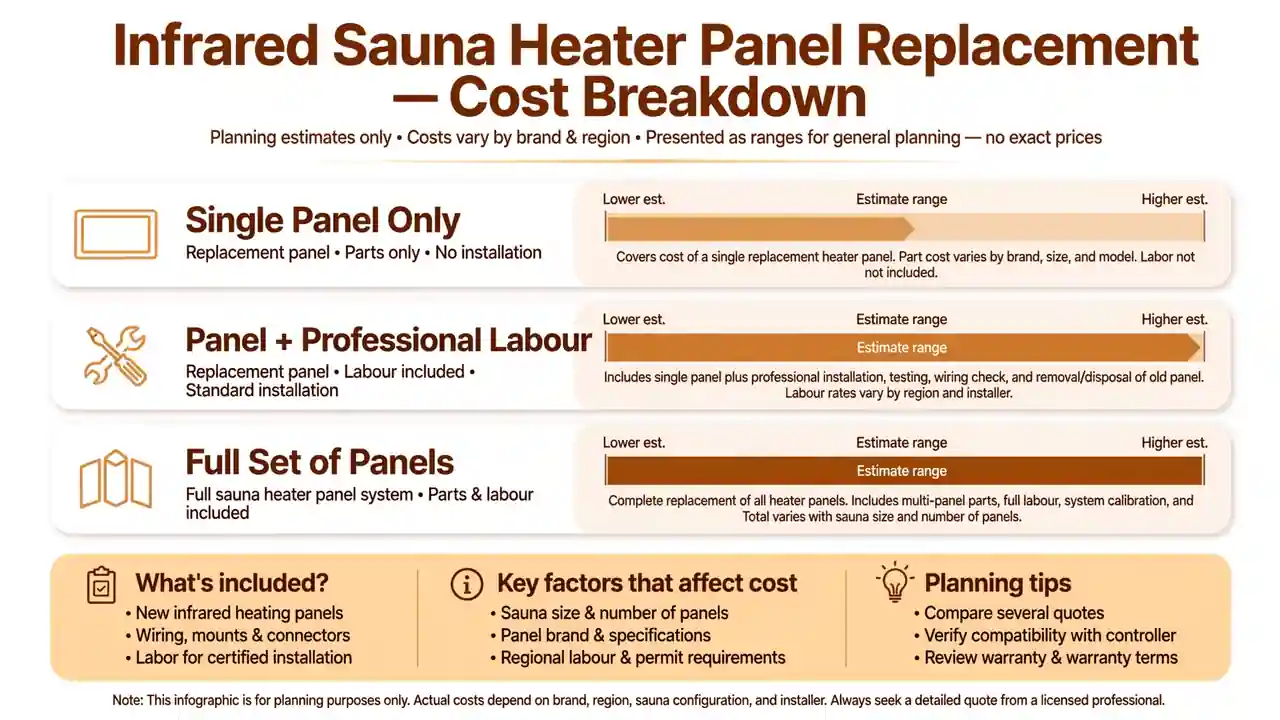
Check the warranty before you pay anything
Many manufacturers warranty heater panels for longer than owners expect, sometimes for several years and sometimes for the life of the cabin for the original buyer. The catch is usually in the conditions: the warranty may cover the panel but not the labour, it may require the original receipt, and it may be void if the panel was fitted by someone other than an authorised technician. Check the warranty terms before you order a part, and before you open anything yourself.
Ways to keep the cost down without cutting corners
Ordering the correct part the first time is the cheapest saving available. A wrong panel costs return postage, waiting time, and sometimes a restocking fee, and it leaves the sauna out of use for longer. Double-check the part number against the manual and the panel label before you order, and confirm the return policy in case the part arrives damaged.
When to Replace the Whole Sauna Instead
There comes a point where replacing panels is good money after bad, and recognising that point saves more than it costs. The decision is rarely about a single panel. It is about the cabin as a system: panels, controller, wiring, wood, door, and seals all age together, and a cabin where several of those are failing at once is telling you something.
Consider a new cabin when three or more panels have failed or faded, when the manufacturer no longer stocks parts for your model, when the controller is also unreliable, or when the wood has warped, the door no longer seals, and the cabin leaks heat faster than the panels can make it. Add up the cost of the panels, the fitting, and the other repairs the cabin needs, and compare that total with a new cabin of the same size. If the repair total reaches half the price of a new cabin, or if the cabin is old enough that another major part is likely to fail within a year, replacement starts to make financial sense.
Keeping New Panels Healthy for Longer
- Check panels every three months. Power off, let the cabin cool, and look at each panel face for discolouration, blistering, or cracks.
- Feel for even heat twice a year. After fifteen minutes at your usual setting, check each panel face with the back of your hand and note any cool patches.
- Keep panels uncovered. Never drape towels, blankets, or clothing over a panel, and keep stored items clear of the panel faces.
- Keep water away from panels. Wipe up splashes promptly, and never spray cleaner directly onto a panel face.
- Warm up at your usual setting. Avoid repeated maximum-temperature starts with the door opening and closing during warm-up.
- Write down heat-up times. A one-line note each month turns a slow fade into a visible trend instead of a vague feeling.
- Keep the manual and receipts together. Part numbers, warranty terms, and purchase dates are the three things you will need when a panel fails.
Frequently Asked Questions
How long do infrared sauna heater panels last?
Typical manufacturer ranges for home use are 10 to 20 years for carbon panels, 5 to 10 years for ceramic panels, and 8 to 15 years for the carbon side of a full-spectrum panel, with the short-wave tube usually lasting less. Real life varies with how often the sauna runs, how hot it runs, and how well it is looked after, so treat these as planning ranges, not guarantees.
Can I replace one infrared sauna heater panel, or must I replace them all?
You can usually replace a single panel, and that is the right choice when one panel has failed and the rest heat evenly. If two or more panels are weak, or the cabin is old, price a full set as well, because the labour for one visit often covers several panels and the set can cost less per panel.
How do I know which heater panel is faulty?
Run the sauna for at least fifteen minutes at your usual setting, then check each panel face with the back of your hand held a few centimetres away. A faulty panel stays cool, has a cool patch, or heats unevenly while the others feel warm across their whole face. Repeat the check on a second day to rule out a draught or a door left ajar.
Is it safe to test a heater panel myself?
The observation checks are safe: feeling for even heat, looking for visible damage with the power off, and noting sounds, smells, and error codes. Do not open a live panel, do not bypass a safety cut-out, and do not use a multimeter on mains wiring unless you are qualified to do so. If a breaker trips or you find damage, switch off at the breaker and call a licensed electrician.
How much does it cost to replace an infrared sauna heater panel?
As a planning estimate, a single panel part usually costs 60 to 400 US dollars depending on the type, and professional fitting usually adds 150 to 400 US dollars. A full set of panels for a small cabin usually costs 400 to 1,200 US dollars for parts alone. These are estimates that vary by brand, region, and installer, so get local quotes before you buy.
Are heater panels covered by warranty?
Often, yes, and sometimes for several years or for the life of the cabin for the original buyer. Cover usually applies to the part, not always to the labour, and it may require the original receipt or authorised fitting. Check the warranty terms and contact the manufacturer with your model number before you order a part.
Heater panels do not fail without warning. They fade, they develop cool patches, they take longer to warm the cabin, and eventually they stop pulling their weight. Catching those signs early turns a full-set replacement into a single-panel job, and a single-panel job is one of the cheapest repairs an infrared sauna will ever need. Check the panels each quarter, write down the heat-up time, and order by part number when the day comes. Your cabin will thank you with even heat for years to come.